| About Genesis OPC Explorer 3.1 |
|
|
| IDE: | MS Visual Studio 2017 |
| Appl. Size: | 11.8 MB (12.386.304) |
| Creation Date: | 20-Oct-2018 18:09:18 |
| Installer Size: | 6.70 MB (7.025.823 bytes) |
| Installer Date | 20-Oct-2018 18:43:37 |
Genesis OPC Explorer 3.1 Menu
Genesis OPC Explorer 3.1
Fast Track
What's New in Release 3.0
Feedback and Awards
Download Counters
Download Genesis OPC Explorer 3.1
Safe Use of Genesis OPC Explorer 3.1
Genesis History
Genesis OPC Explorer Setup
Select OPC Server
Manage OPC Groups
Manage Acquired OPC Items
Manage Calculated OPC Items
Load OPC Project
Save OPC Project
Close OPC Project
Data Acquisition and Storage
Start Data Acquisition
Resume Data Acquisition
Stop Data Acquisition
Display Performance Data
Acquisition Data Matrix
OPC Data Listing
Display of OPC Data Listing
Export OPC Data
Export to Clipboard
Toggle Performance Display
Configure Types Color
OPC Data Charting
Display of OPC Data Chart
Set Chart Series Colour
Set Chart Title Options
Manipulate Chart Display
Set Series Selection
Set Chart Axis
Set Chart Legends
Save Chart Image as File
Save Chart Image to Clipboard
Enable Cursor Data
Toggle Server Data Display
Registration and Support
Register Genesis OPC Explorer 3.1
Support of Genesis OPC Explorer 3.1
Register Support of Genesis OPC Explorer 3.1
 |
Thanks for bringing support to TGMDev |
| through PayPal Donations... |
 |
|
|
|
|
Addition, Modification and Removal of Acquired OPC Item(s)
Adding acquired Item(s) to an OPC Group requires beforehand the selection of an OPC Server
(click here to get details on selection of an OPC Server)
and the addition of an OPC Group (click here to get details on addition of an OPC Group).
Addition of calculated item(s) to an OPC Group is explained here
1. Addition of OPC Item
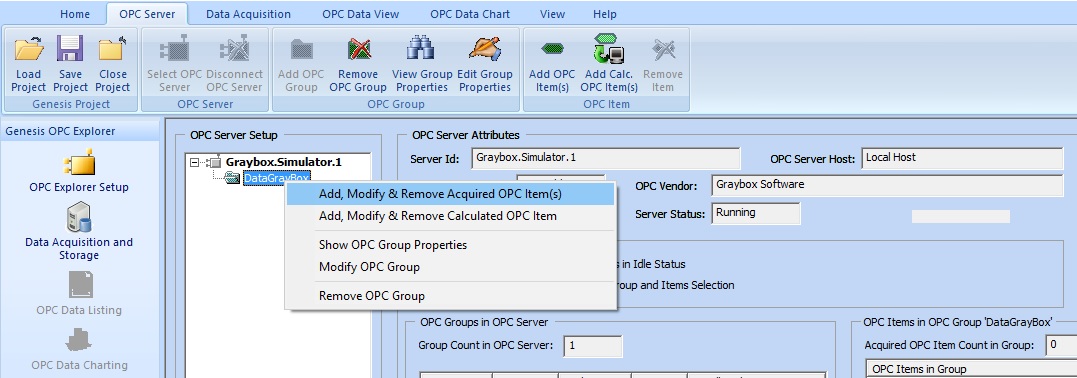
After OPC Group Selection, the third step is the addition of OPC Item(s) in existing OPC Group(s).
Two methods are available to start the OPC Item(s) Addition:
- Select the OPC Group to Add Items(s) to and Click on the Ribbon Button 'Add OPC Item(s)' in the Ribbon Tab 'OPC Server'

- Right-Click the OPC Group (to add item(s) to) in the 'OPC Explorer Setup' Tree Control and Select the menu 'Add, Modify and Remove Acquired OPC Item(s)'
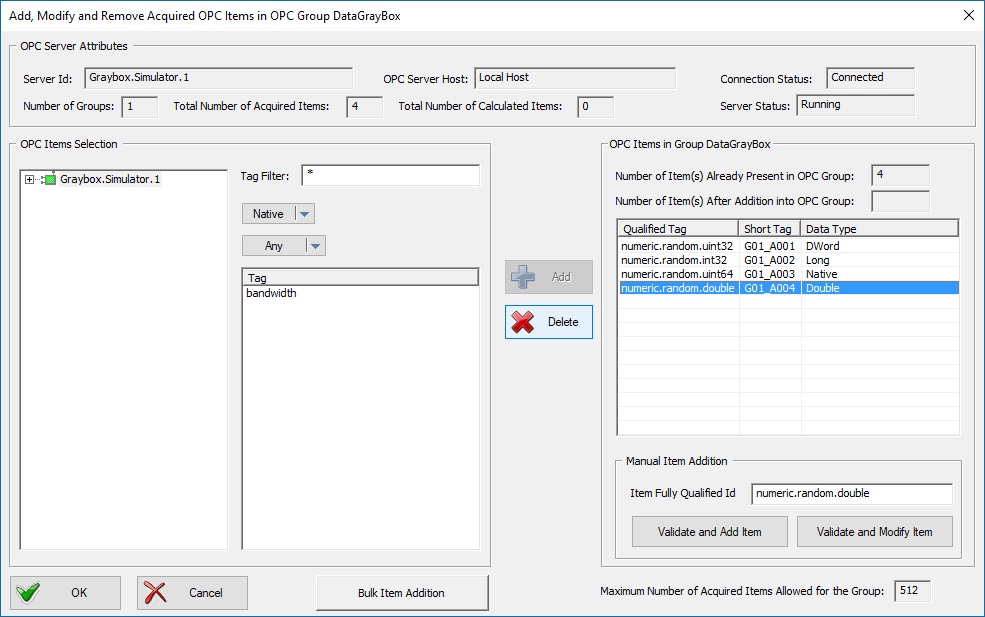
 Addition of the OPC Item
- Browse the Hierarchy of the OPC Server and Select the Required OPC Data Object.
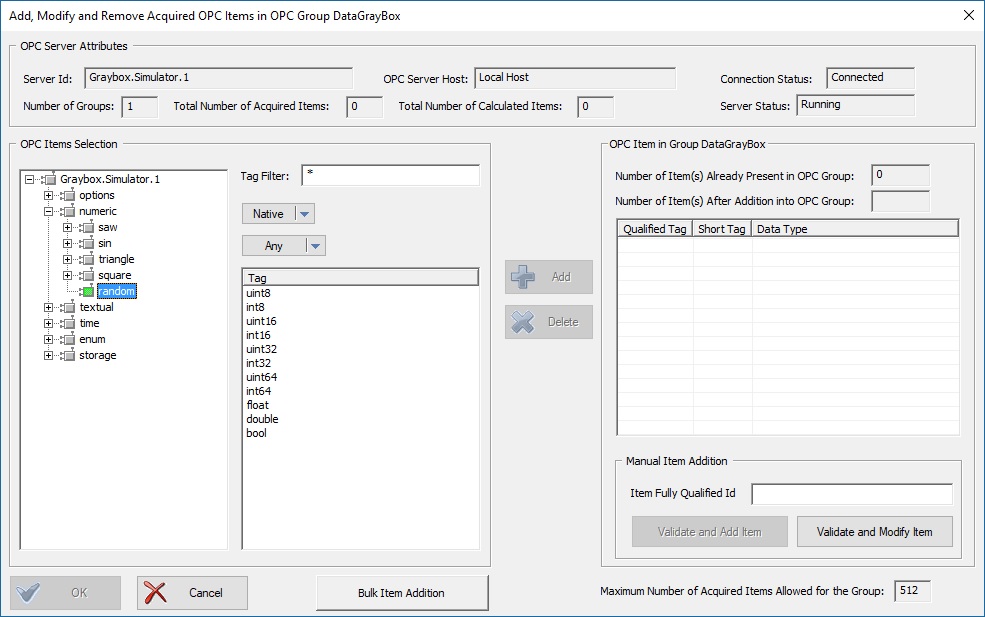 Browse the OPC Server 'GrayBox OPC Simulator
Note that the selection of the OPC Server Data Object ('Random' in the Screen Copy) triggers the filling of the table
with the available OPC Item(s) in the selected OPC Server Data Object.
- Select one (or more) tag(s) and click on the 'Add' Button to Add the Selected Items()s to the List of OPC Item(s) of the Current OPC Group
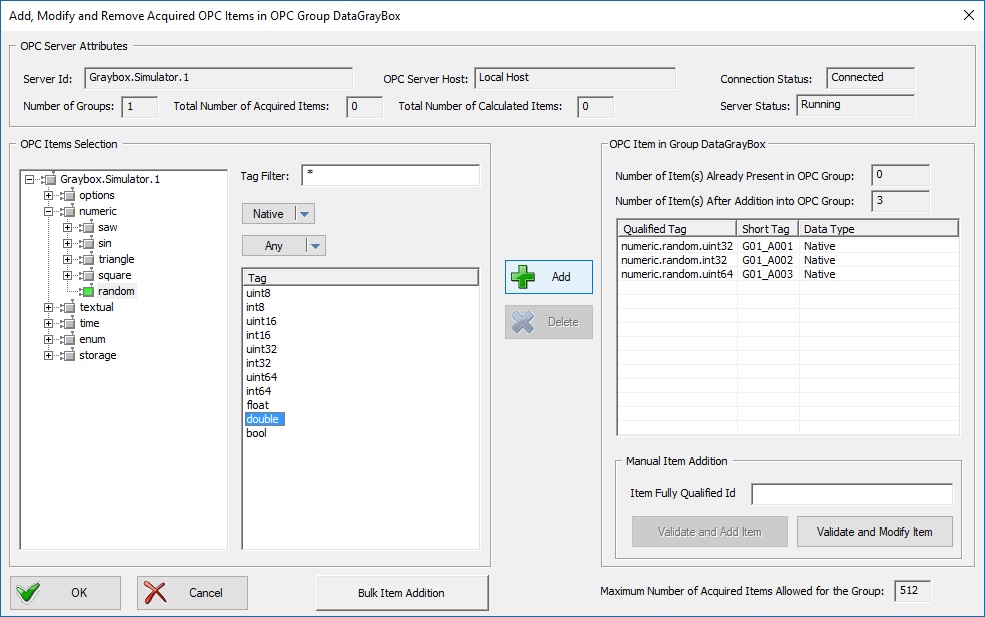 Add Selected Tags to OPC Group
In the screen copy, three tags (numeric.random.uint32, numeric.random.int32, and numeric.random.uint64 ) were added. A fourth one
(numeric.random.double) is selected. The 'Add' button is activated to indicate that addition can be triggered.
Note that Genesis OPC Explorer 3.1 automatically adds the Fully Qualified Item Names (as numeric.random.uint32) and Create the Default
Short Item Identifier (as G01_A001). The short tag name is based on the format specification 'Gxx_Ayyy' where xx is the OPC Group
Index) and yyy the OPC Item Index in the OPC Group.
These identifiers will be used for:
- Confirm OPC Item(s) addition by clicking on the 'Ok' button.
2. Modification of OPC Item
- Open the dialog box for 'OPC Item Addition, Modification and Removal' dialog box
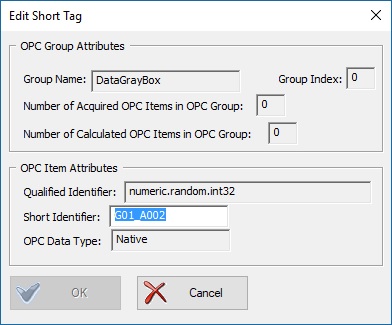
- Click on the 'Short Tag' column of an existing item of the OPC Group
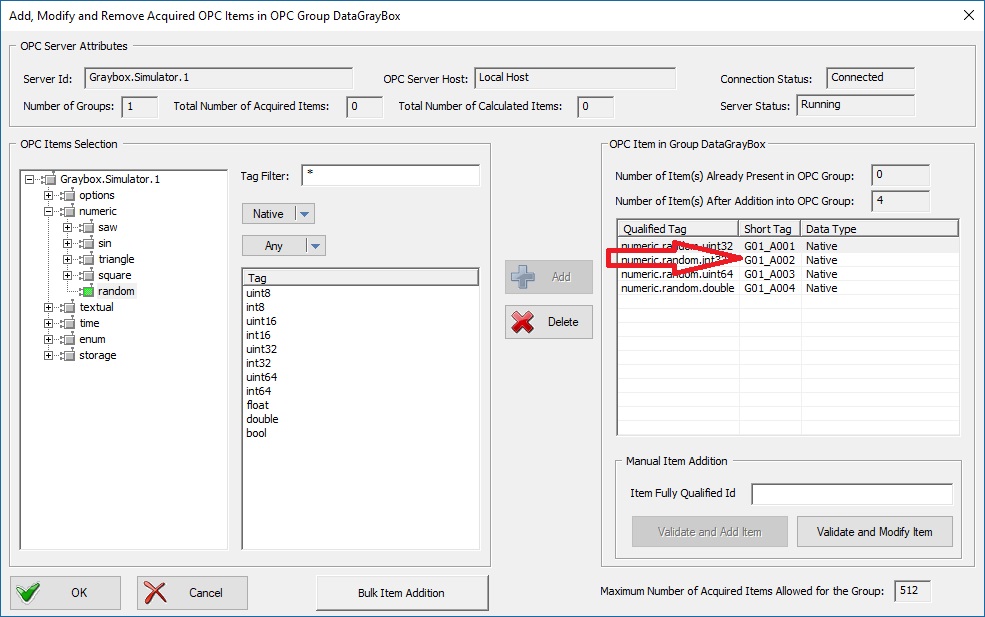 Modify the Short Identifier of an OPC Item
- Edit the Short Identifer and Confirm with the button 'Ok'
 |
|
Remember that this Identifier is useful for:
Note that Short Tag Identifier must be unique. If the item violates this rule, an Error Message Box pops up ....
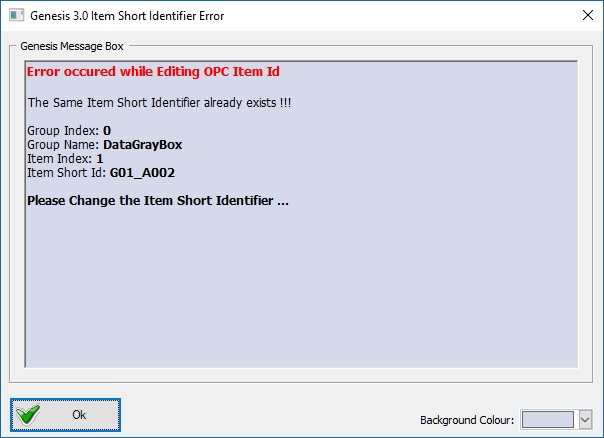 Error Editing OPC Item Short Tag Id
|
3. Removal of OPC Item(s)
- Open the dialog box for 'OPC Item Addition, Modification and Removal' dialog box (as explained above)
- Select a tag already added in the current OPC Group
- Click on the 'Delete' button to Remove the selected OPC Item from the OPC Item List of the Current OPC Group.
 Delete OPC Item
- Confirm with the 'Ok' button. Note that there is no Confirmation Request from Genesis OPC Explorer 3.1.
There is also a direct way to delete OPC Items.
Note: Due to a bug in Genesis OPC Explorer 3.0, this method works only for items with default names (Gxx_Axxx)
Two methods are available to start a direct OPC Item(s) removal:
- Select the OPC Item to Delete and Click on the Button 'Remove Item' in the Ribbon Tab 'OPC Server'
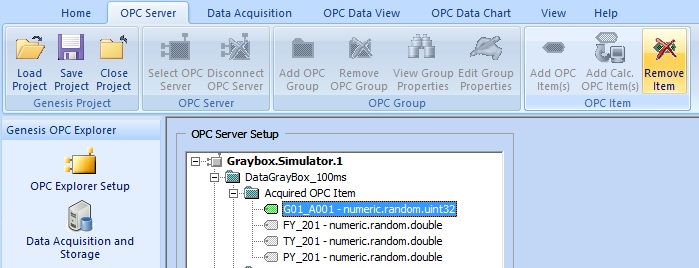
- Right-Click the OPC Ietm to Delete in the 'OPC Explorer Setup' Tree Control and Select the menu 'Remove OPC Item'
 Removal of the OPC Item
Genesis OPC Explorer 3.1 triggers a Message Box to request confirmation for OPC Item Removal
- Confirm the removal of the selected OPC Item from the OPC Group with the button 'Ok'
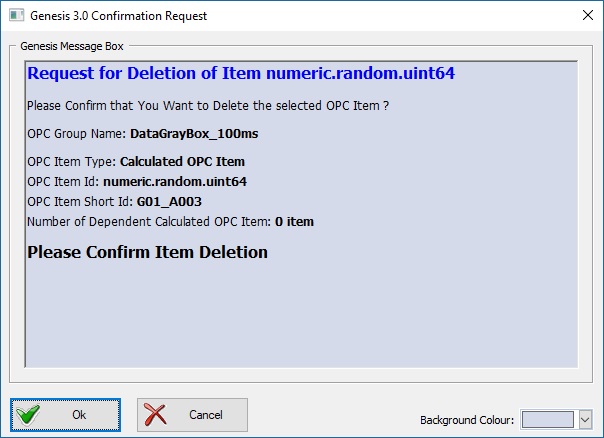 Request for OPC Item Removal |
|
|
|
Tell your Friends about Genesis OPC Explorer 3.1
Visitors Count: 35117
|

