Windows Utilities

 | Windows Utilities |  |
PhotoRenamer 4.1 |
|
Tell your Friends about PhotoRenamer 4.1 PhotoRenamer 4.1 Menu Fast Track Help Video: Quick Tour What's New in PhotoRenamer 4.1 Feedback and Awards of PhotoRenamer 4.1 Download Counters of PhotoRenamer
Safe Use of PhotoRenamer 4.1 TGMDev PhotoRenamer History Renaming Mask Fast Track Renaming Photos with PhotoRenamer 4.1 Mask Format Specifications Edition of Renaming Masks of PhotoRenamer 4.1 Handling of Duplicates File Extension Files Selection Fast Track Files Selection Help Video Special Specifications Fast Track Keywords Specifications Keyboard Entries Specification Picture Counter Specifications Meta Data Exif Meta Data IPTC Meta Data User Interface Fast Track Ribbon Category 'Home' Ribbon Category 'Photo Rename' Ribbon Category 'Details' Ribbon Category 'Options' Ribbon Category 'View' Ribbon Category 'Help' Registering, Feedback and Support Registering PhotoRenamer 4.1 Feedback about PhotoRenamer 4.1 Support of PhotoRenamer 4.1
|
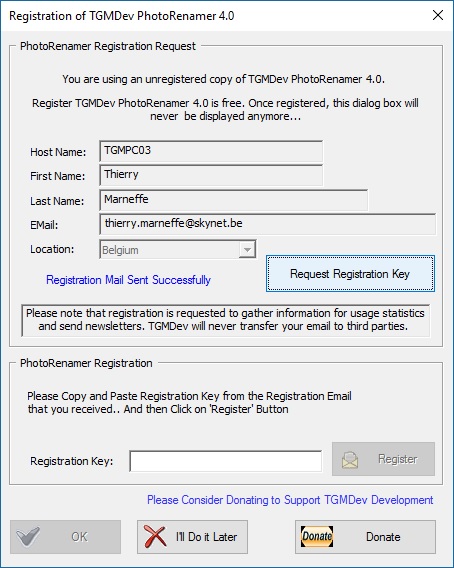
Registering PhotoRenamer 4.1 On Exit of the application, unregistered users are invited to register to PhotoRenamer 4.1.
To register, enter the following data:

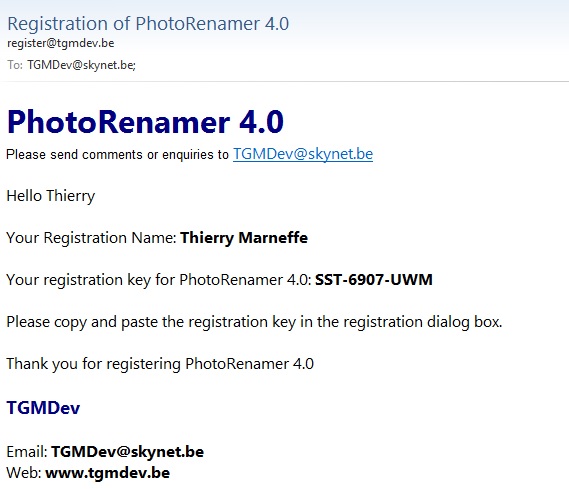
After a few seconds, a mail should enter your mail box with your registration code. It should look like this ... 
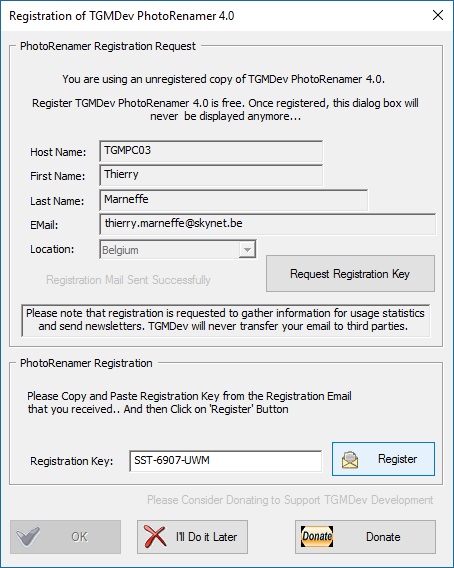
The next steps are:

Once the Registration is activated, the 'Ok button is enabled .. You can always postpone the registration by clicking on 'I'll Do Later'. Note that the request be be activated again on next session exit. |
|||||||||||||||||||||||||||||||||||||||||